
The promise of a fresh, modern look at a fraction of the cost of hardwood is hard to ignore. Floating laminate floors have earned their reputation for being stylish, versatile, and surprisingly DIY-friendly. But what exactly makes this flooring option so popular, and how can you ensure flawless installation in your own space?
What Is a Floating Laminate Floor and Why Choose It?
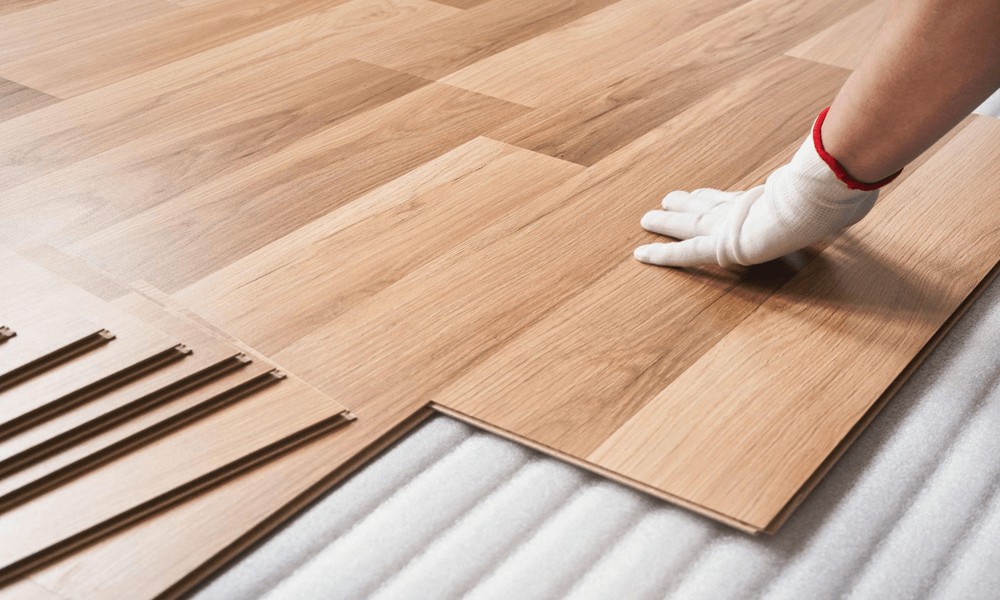
Unlike traditional flooring that nails or glues down plank by plank, a floating laminate floor clicks together above your subfloor, relying on its own interlocking system for stability. This design means no adhesives, no nails, and far fewer headaches for homeowners. The floor “floats” above the base, allowing subtle movement and expansion with changes in humidity.
How Does Floating Laminate Flooring Work?
Each plank of laminate contains a tongue-and-groove edge that snaps tightly with the next, creating a seamless surface. This interlocking action is what enables the floor to rest on a layer of underlayment without being fastened directly to the subfloor.
Benefits Compared to Other Flooring Types
Floating laminate is exceptionally forgiving. If your subfloor is less than perfect, minor imperfections can be masked with a quality underlayment. Water resistance (in many products), fade resistance, low maintenance, and affordability all add to its appeal. Added bonus? If you change your mind in a few years, uninstalling is much easier than with glued or nailed floors.
What Tools and Materials Are Needed?
The right tools make all the difference between a project you’re proud of and a DIY regret.
Essential Tools for Installation
– Measuring tape and pencil
– Carpenter’s square
– Utility knife
– Laminate floor cutter or fine-tooth saw
– Rubber mallet and tapping block
– Pull bar
– Spacers for wall gaps
– Safety goggles and gloves
Understanding Different Laminate Flooring Types (EIR, Glossy, Matt)
Laminate comes in a range of finishes. Embossed-in-Register (EIR) mimics the texture of real wood, while glossy styles reflect more light and offer a sleek finish. Matt finishes are subtle and modern. Brands like Club Ceramic offer several choices, so consider the traffic patterns and lighting in your room when selecting a look.
Preparing Your Flooring Materials
Leave the unopened boxes of laminate planks in the installation room for 48 hours. This acclimates the material to the temperature and humidity, preventing unwanted expansion or contraction after installation.
How to Prepare Your Subfloor for Installation?
A little prep work can make or break the final result.
Inspecting and Cleaning the Subfloor
Clear away old flooring, nails, dust, and debris. Sweep and vacuum thoroughly. The goal is a clean, dry, and as-level-as-possible surface.
Moisture Barriers and Underlayment Options
On concrete or below-grade floors, a moisture barrier is essential to prevent damage. Most installations also require an underlayment to cushion the laminate, muffle sound, and create a barrier against minor imperfections.
Leveling and Repairing the Surface
Check for dips or high spots. Use leveling compound for low areas and sand down high points. Excessive unevenness can clip the lifespan of your floor.
How Do You Start Installing Floating Laminate Flooring?
Precision pays off before you lay even a single plank.
Measuring and Planning Your Layout
Measure the length and width of the room, then calculate how many planks you’ll need. Plan to stagger seams for a more natural look and avoid having a sliver for your final row. Dry-fit a row or two to check how the end pieces will look.
Laying the Underlayment Correctly
Roll out the underlayment perpendicular to the direction you’ll run the planks. Tape seams securely, ensuring there are no overlaps or gaps.
What Are the Step-By-Step Installation Procedures?
With prep out of the way, it’s time to transform the space.
How to Install the First Row Accurately
Lay the first plank with the tongue side facing the wall. Use spacers to maintain a 1/4-inch expansion gap. Join each new plank end-to-end, cutting the last piece to fit as needed.
Connecting the Laminate Planks: Tips for Seamless Joints
For the next row, angle the plank and click it into place along the long edge. Use the tapping block to tighten the seams, then work down the row. Remember to stagger the joints by at least eight inches for strength and appearance.
Handling Corners, Doorways, and Irregular Spaces
Carefully measure and cut planks to fit under door jambs and around corners. A pull bar will help lock the final pieces into place without damaging the boards.
How to Finish and Maintain Floating Laminate Floors?
The small details are key to a polished look.
Installing Transition Strips and Moldings
Attach transition strips where your laminate meets tile or carpet. Cover the expansion gap along the walls with quarter-round or baseboard molding, being careful not to nail into the floor.
Tips for Cleaning and Long-Term Maintenance
Sweep regularly and mop with a damp (not wet) cloth. Avoid harsh chemicals and standing water to protect the finish.
Troubleshooting Common Installation Issues
If planks don’t click together easily, double-check for debris and confirm tongues and grooves are aligned. If you notice spongy areas, recheck for uneven subfloors or missing underlayment.
How to Avoid Common Mistakes During Installation?
Mistakes are common but preventable.
What Are the Most Frequent Pitfalls and How to Prevent Them?
– Skipping acclimation (can cause buckling)
– Failing to leave expansion gaps (can lead to peaking)
– Installing on a wet or uneven subfloor
How to Ensure Proper Expansion Gaps and Flooring Stability
Use spacers consistently and remove them only after trim is installed. Never fasten the floor to the subfloor or walls, as this stops the floating action.
Where to Find Quality Floating Laminate Flooring?
Finding the right product is as important as the installation.
How to Choose the Right Style and Finish for Your Space
Consider glossy for brightness, matt for subtlety, and EIR for textural realism. Factor in room size, light, and usage.
Recommended Brands and Where to Buy (Including Club Ceramic Options)
For durable, stylish choices, explore leading brands that offer a mix of finishes and series. Experts suggest that Club Ceramic laminated flooring is worth considering for its variety and performance. Browse samples in person to appreciate color and feel before making your purchase.
With a little patience and attention to detail, installing floating laminate floors can be a rewarding project that transforms your space for years to come.